I hope you enjoyed your Easter! The Tsoureki bread (see previous post) came out wonderful, and tasted great -even if it's a rather dense bread. Below are a few pictures of the process and finished product. For now I'm going to relax and enjoy this warm weather and try to not mind the humidity while watching the Red Sox kick some butt.
Sunday, April 24, 2011
Tuesday, April 19, 2011
Greek Easter Bread, hard boiling fresh eggs
Tsoureki or Greek Easter Bread
This looks so delicious, doesn't it? I have never made it, but I'm going to attempt it for Easter this Sunday. I picked out the lightest eggs from our chickens to hard boil and dye, which I will do later today. As an ironic aside, one of our darkest coloured chickens lays the lightest coloured eggs! As for the egg dye, I have tried the traditional, 'organic' ways of dyeing; like boiling yellow onion skins to make yellow, boiling beets to make red, etc... But ya know, I really just love using the generic egg dyeing kits or food colouring -so sue me! Let alone the ease of use by those methods, the vibrant colours they make, it also brings back fond childhood memories.
Hard boiling fresh eggs and getting the shells to peel off without taking the white off with the shell is tricky. The method that works for me is boiling the eggs with a little (1 tbsp. or so) cider vinegar (white vinegar can be substituted) in the boiling water for 20-30 minutes. Then run cold water over the eggs for 1-2 minutes, and let them sit in the cold water bath, periodically changing out the water when it gets warm [from the eggs residual heat] for the next hour or two. The most important step besides the vinegar though, is letting the hard boiled eggs sit in the fridge for at least 3 days before peeling. If you can wait a week, it's even better. I reckoned this out through trial and error, but I'm sure somebody must have figured this out long before me.
Now onto the Tsoureki!
A few notes before we begin. In Greek culture all the eggs in this bread are traditionally dyed red -you will notice the part about boiling the eggs in beet juice. Apparently, it's in order to represent the blood of Jesus Christ. I'm going to skip that part and use food colouring dyed eggs. I also am going to substitute the 1 tbsp. anisette liquor and 3 tiny drops anise oil, with 1 tbsp. Anise extract. I am also using Honey vs. Agave nectar.
*The picture and recipe are courtesy Cooks.com
Tsoureki or Greek Easter Bread
1 pkg. yeast dissolved in 1/4 cup lukewarm water (110°F)
1/2 cup milk
1/2 cup butter
1 tsp. pure vanilla
1 tbsp. freshly grated orange zest (or a few drops of pure orange oil)
1 tbsp. anisette liquor
3 tiny drops anise oil
1 tsp. salt
4 to 5 cups all-purpose flour
1/2 cup honey or agave nectar
2 large eggs, well beaten
1 egg yolk (reserve the white for egg wash for top)
hard boiled eggs dyed red (1 for each person)
For the milk, use reconstituted non-fat dry milk or scalded fresh milk.
To dye the hard boiled eggs, I add a tablespoon of cider vinegar to the liquid from a can of sliced beets in a small stainless steel pan. Add the eggs with enough water to cover and boil for 1 or 2 minutes, cover and let stand for 15 minutes, then cool. The eggs may also be dyed red using food colorings if you prefer a brighter color.
To prepare the dough, dissolve the yeast and set aside for 5 minutes. Heat the milk to scald, melt the butter add the honey and cool for about 15 minutes before adding to the yeast (about 100°F).
In a stand mixer, add 2 cups flour and remaining ingredients (except flour) and beat for 2-3 minutes. Add the remaining flour a small amount at a time, until the dough forms a ball and begins to leave the side of the bowl.
With the dough hook attachment, knead for 6-8 minutes. Remove to a floured surface and knead by hand until smooth and elastic. Put into an oiled bowl and turn to coat with oil on all sides. Cover and let rise in a warm, draft free place until nearly doubled. Punch down, divide dough into two ropes; twist the two together, then form a ring or a wreath and pinch the ends together; tuck them under to hide. Let rise, again for about 30-40 minutes.
Tuck a colored egg at even intervals around the wreath by spreading a rope twist to fit around the egg. Cover and let rise another 20-30 minutes or so.
15 minutes before baking, preheat the oven to 375°F.
To make an egg wash, beat the saved egg white with a tablespoon of water and brush it over the top. (Don't allow the egg to pool in the valleys and leave the boiled eggs without brushing.) Sprinkle sesame seeds over the bread.
Bake for about 25-30 minutes, or until the internal temperature of the bread reads 190°F on an instant-read thermometer. Cool on a wire rack.
Monday, April 18, 2011
Herb garden
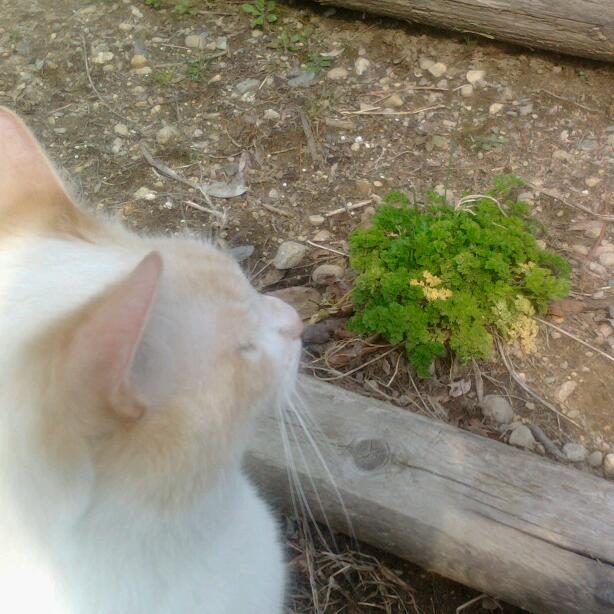
As you may have noticed in my seed planting post, no mention of herbs was made. The reason is because many of my herbs survived the hard New England winter. The only herb seeds I did plant this year were cilantro and lavender. Later on I plan to fill in the blanks of what I am missing by going to the local nursery (dill and basil for example). I'll share the pictures of what came back with you.
Peppermint
Chives
Thyme (with Sage in the background)
Tarragon
Oregano
Sage
Labels:
chives,
herb garden,
herbs,
oregano,
parsley,
peppermint,
sage,
tarragon,
thyme
Seeds started!
Please excuse the lack of posts, but I went away to a family member's (fabulous!) wedding this weekend. On the way back, we stopped and finally got the supplies to start all the seeds for this years garden. I didn't even unpack first, just got right down to business... A bag of soil, 17 tape & toothpick flags for labels, and 136 little slots in trays later, everything is planted.
We placed the seed trays on top of the fridge. Huh? Well, it really makes perfect sense -heat from the refrigerator coils, indirect sunlight, and kitchen humidity all equal perfect sprouting conditions. Once they have sprouted, they will be moved down for more light, then get ready to be hardened for planting. I can't wait!
Tomatoes, onions, peppers, beans, melons, squashes, lettuces... oh my! Other than fearing I may have planted too many beans, this year will be wonderful! I have the feeling once everything is in full swing, any time that isn't spent weeding, will be spent on pickling and canning. Any volunteers for a canning partner?
We placed the seed trays on top of the fridge. Huh? Well, it really makes perfect sense -heat from the refrigerator coils, indirect sunlight, and kitchen humidity all equal perfect sprouting conditions. Once they have sprouted, they will be moved down for more light, then get ready to be hardened for planting. I can't wait!
Tomatoes, onions, peppers, beans, melons, squashes, lettuces... oh my! Other than fearing I may have planted too many beans, this year will be wonderful! I have the feeling once everything is in full swing, any time that isn't spent weeding, will be spent on pickling and canning. Any volunteers for a canning partner?
Wednesday, April 13, 2011
Surf & Turf and Scalloped Potatoes
Tonight's dinner was originally going to be Chourico and Peppers, but after helping a friend move today, I didn't have enough time to throw it in the crock pot by the time I got home... So, tonight is now steak, stuffed quahogs or "stuffies" with scalloped potatoes on the side! I love stuffies, and I love scalloped potatoes even though I don't make them enough. I always forget that this bubbly, milky potato dish takes a while to cook, so dinner may be a wee bit late tonight. It's incredibly easy to throw together, only it takes just over an hour to cook in the oven. Leave yourself some time, and make this for dinner tomorrow!
This recipe is taken from my go-to recipe bible, Better Homes and Gardens New Cook Book.
Scalloped Potatoes
1 medium Onion, chopped (although I prefer sliced)
1 clove Garlic, minced
2 tbsp. Butter [or margarine]
2 tbsp. Flour, all-purpose
1/4 tsp. Black Pepper
dash Salt
1 1/4 cups Milk
3 medium potatoes (1 pound), such as long white, round white, round red, or yellow.
-Preheat oven to 350 degrees
-Grease a 1 1/2 qt. casserole, set aside.
-For sauce: In a small sauce pan cook onion and garlic in butter until tender, but not brown. Stir in flour, salt, and pepper. Add milk all at once. Cook and stir over medium heat until thickened and bubbly.
-Thinly slice potatoes. Place 1/2 the sliced potatoes in bottom of prepared casserole. Cover with 1/2 the sauce. Repeat potato and sauce layers.
-Bake, covered, in a 350 degree oven for 40 minutes. Uncover and bake about 30 minutes more or until potatoes are tender.
Makes 4-6 servings.
Good variations on this dish are to add cheese to the sauce, or just top with cheese or Italian bread crumbs. I like it this plain old way, served with fresh chopped chives on top. Also, I like the red potatoes in this best, but tonight I had Idaho potatoes I needed to use up.
This recipe is taken from my go-to recipe bible, Better Homes and Gardens New Cook Book.
Scalloped Potatoes
1 medium Onion, chopped (although I prefer sliced)
1 clove Garlic, minced
2 tbsp. Butter [or margarine]
2 tbsp. Flour, all-purpose
1/4 tsp. Black Pepper
dash Salt
1 1/4 cups Milk
3 medium potatoes (1 pound), such as long white, round white, round red, or yellow.
-Preheat oven to 350 degrees
-Grease a 1 1/2 qt. casserole, set aside.
-For sauce: In a small sauce pan cook onion and garlic in butter until tender, but not brown. Stir in flour, salt, and pepper. Add milk all at once. Cook and stir over medium heat until thickened and bubbly.
-Thinly slice potatoes. Place 1/2 the sliced potatoes in bottom of prepared casserole. Cover with 1/2 the sauce. Repeat potato and sauce layers.
-Bake, covered, in a 350 degree oven for 40 minutes. Uncover and bake about 30 minutes more or until potatoes are tender.
Makes 4-6 servings.
Good variations on this dish are to add cheese to the sauce, or just top with cheese or Italian bread crumbs. I like it this plain old way, served with fresh chopped chives on top. Also, I like the red potatoes in this best, but tonight I had Idaho potatoes I needed to use up.
Tuesday, April 12, 2011
Boston Baked Beans
As any good Yankee will argue, their baked beans are the best.... It's kinda like chili in Texas. The few things all baked bean recipes have in common is time, love, and beans. Outside that, it's free game. Everyone has their own recipe, but I'm going to share ours -which is the best way to make them, by the way. If you would like to view another variation, check out my article on Old Post Road for my Grandmother's recipe.
A great attribute to baked beans, is that they can be a meal unto themselves or a sides for the whole week. A great help yourself meal for a crowd or just your family. Chock full of protein and fiber, with minimal prep and a lot of time in the crock pot, it's a true winner. I have yet to meet a person that will willingly turn down Boston Baked Beans...
Sam & Laura's Boston Baked Beans:
2 cups 'Great Northern' beans (dry measure, approximately one 16 oz. bag)
1 tsp. Salt
2 Ham Hocks
2 small Onions, quartered
5 tbsp. Molasses
4 tbsp. Brown Sugar (dark or light)
2 tsp. Dry Mustard
------
Bacon, crisped and crumbled
prepared Mustard
salt
-Soak beans overnight. Cover the dry beans with about 2" of water head space.
-Once beans are soaked (about 1/2" of water head space should be remaining), stir in salt.
-Drain water, reserving it.
-Put beans, ham hocks and onions in crock pot.
-Taking a sauce pan, mix all other ingredients except bacon and prepared mustard. Cook over low heat until ingredients are completely combined, and warm. Do not boil.
-Pour sauce pan contents into the crock pot [with the beans, hocks, and onions], and stir to coat.
-Take your reserved salted water from draining the beans, and pour enough to cover crock pot ingredients.
-Bake on LOW overnight, or for 12 hours, stirring occasionally. Don't attempt to shorten the time by cooking on HIGH - It won't be the same, trust me.
-When beans are done, remove ham hocks.
-Mix in crisped bacon pieces before serving. At this point if you need/want to adjust the flavour of the beans a little, add prepared mustard and salt to taste.
A great attribute to baked beans, is that they can be a meal unto themselves or a sides for the whole week. A great help yourself meal for a crowd or just your family. Chock full of protein and fiber, with minimal prep and a lot of time in the crock pot, it's a true winner. I have yet to meet a person that will willingly turn down Boston Baked Beans...
Sam & Laura's Boston Baked Beans:
2 cups 'Great Northern' beans (dry measure, approximately one 16 oz. bag)
1 tsp. Salt
2 Ham Hocks
2 small Onions, quartered
5 tbsp. Molasses
4 tbsp. Brown Sugar (dark or light)
2 tsp. Dry Mustard
------
Bacon, crisped and crumbled
prepared Mustard
salt
-Soak beans overnight. Cover the dry beans with about 2" of water head space.
-Once beans are soaked (about 1/2" of water head space should be remaining), stir in salt.
-Drain water, reserving it.
-Put beans, ham hocks and onions in crock pot.
-Taking a sauce pan, mix all other ingredients except bacon and prepared mustard. Cook over low heat until ingredients are completely combined, and warm. Do not boil.
-Pour sauce pan contents into the crock pot [with the beans, hocks, and onions], and stir to coat.
-Take your reserved salted water from draining the beans, and pour enough to cover crock pot ingredients.
-Bake on LOW overnight, or for 12 hours, stirring occasionally. Don't attempt to shorten the time by cooking on HIGH - It won't be the same, trust me.
-When beans are done, remove ham hocks.
-Mix in crisped bacon pieces before serving. At this point if you need/want to adjust the flavour of the beans a little, add prepared mustard and salt to taste.
This is what it looks like before cooking.
Don't worry if it looks soupy, the beans will absorb all the liquid goodness.
Thursday, April 7, 2011
Grillin' season!
Not that we stop grilling during the winter: but with the lack of snow, the warmer, longer days, grilling is much more in full swing. Excepting the baked sweet potatoes [and steak sauce], everything for last nights dinner was grilled. I have felt as though I have been 'slacking' on meals lately (light, easy), and this was a wonderful full-filling dinner.
First up: Steak. I don't recall exactly what type of cut it was, but we bought it fresh from the market that day (rather inexpensively), and simply seasoned it with salt, pepper, and garlic powder. We let it sit, uncovered in the fridge for a couple of hours, then rubbed it with olive oil right before grilling. Simplest is best!
Next up: Veggies. Mushrooms and Sweet Potatoes. As I mentioned before hand, the potatoes were not grilled. Simply pricked with a fork, and thrown into a 400 degree oven for around 40 minutes. The mushrooms were grilled after being de-stemmed, and brushed with garlic infused olive oil. They came out perfect, though we thought they lacked seasoning. It turned out the 'steak sauce' complimented the mushrooms better than the steak! I personally believe basting mushrooms with butter and Old Bay seasoning is the best way to go for grilling them (thanks to my peeps in West Virginia for teaching me that!).
Finally: Fruit. Quite frankly, the best way to have pineapple, is grilled. Just straight cut up and grilled. Especially if your pineapple tastes a little tart raw, grilling brings out the hidden sugars. Mmmm, I can't get enough of it! Grilled pineapple will be served in heaven, I assure you!
Additional: Sauce and Drink. A byproduct of hosting a wine party, is having half drunk bottles of wine filling your fridge. A novice wine drinker brought a [red] Shiraz to a white/blush only wine party... That wine was thus disqualified from judging -but free game for after! In order to 'clean out the fridge' we had the Shiraz with dinner. It turned out to be quite a nice surprise, complementing the meal perfectly! It is entitled "ASS KiSSER", from southern Australia [2007]. It's label, with a red and cream colour scheme, and cute donkey that has lipstick lip prints on his butt, is hard to miss if you want to give it a try.
The sauce I made was a recipe from Bobby Flay. It has a subtle spiciness to it, but almost overpowering in it's flavours. Don't get me wrong: I will make this often, and we loved it -the thing is, the steak was grilled so nicely last night, we didn't need anything to help it along taste wise. It did enhance the mushrooms amazingly, and even tasted good on the pineapple! True story! Please, give this sauce a try, and let me know what you think. Here's how to make a half batch, which is plenty:
Bobby Flay's Steak Sauce Mayonnaise:
1/2 cup Hellman's mayonnaise
1 1/2 tbsp. Molasses
1 tbsp. Dijon mustard
1 tbsp. whole grain Dijon mustard
1 tbsp. prepared Horseradish
1/2 tbsp. Ketchup
Kosher Salt, and freshly ground Black Pepper
Whisk all ingredients together in a medium bowl. Cover and refrigerate at least 1 hour [before serving] to allow flavors to meld.
First up: Steak. I don't recall exactly what type of cut it was, but we bought it fresh from the market that day (rather inexpensively), and simply seasoned it with salt, pepper, and garlic powder. We let it sit, uncovered in the fridge for a couple of hours, then rubbed it with olive oil right before grilling. Simplest is best!
Next up: Veggies. Mushrooms and Sweet Potatoes. As I mentioned before hand, the potatoes were not grilled. Simply pricked with a fork, and thrown into a 400 degree oven for around 40 minutes. The mushrooms were grilled after being de-stemmed, and brushed with garlic infused olive oil. They came out perfect, though we thought they lacked seasoning. It turned out the 'steak sauce' complimented the mushrooms better than the steak! I personally believe basting mushrooms with butter and Old Bay seasoning is the best way to go for grilling them (thanks to my peeps in West Virginia for teaching me that!).
Finally: Fruit. Quite frankly, the best way to have pineapple, is grilled. Just straight cut up and grilled. Especially if your pineapple tastes a little tart raw, grilling brings out the hidden sugars. Mmmm, I can't get enough of it! Grilled pineapple will be served in heaven, I assure you!
Additional: Sauce and Drink. A byproduct of hosting a wine party, is having half drunk bottles of wine filling your fridge. A novice wine drinker brought a [red] Shiraz to a white/blush only wine party... That wine was thus disqualified from judging -but free game for after! In order to 'clean out the fridge' we had the Shiraz with dinner. It turned out to be quite a nice surprise, complementing the meal perfectly! It is entitled "ASS KiSSER", from southern Australia [2007]. It's label, with a red and cream colour scheme, and cute donkey that has lipstick lip prints on his butt, is hard to miss if you want to give it a try.
The sauce I made was a recipe from Bobby Flay. It has a subtle spiciness to it, but almost overpowering in it's flavours. Don't get me wrong: I will make this often, and we loved it -the thing is, the steak was grilled so nicely last night, we didn't need anything to help it along taste wise. It did enhance the mushrooms amazingly, and even tasted good on the pineapple! True story! Please, give this sauce a try, and let me know what you think. Here's how to make a half batch, which is plenty:
Bobby Flay's Steak Sauce Mayonnaise:
1/2 cup Hellman's mayonnaise
1 1/2 tbsp. Molasses
1 tbsp. Dijon mustard
1 tbsp. whole grain Dijon mustard
1 tbsp. prepared Horseradish
1/2 tbsp. Ketchup
Kosher Salt, and freshly ground Black Pepper
Whisk all ingredients together in a medium bowl. Cover and refrigerate at least 1 hour [before serving] to allow flavors to meld.
Labels:
baked sweet potatoes,
bobby flay,
bobby flay steak sause mayonnaise,
dinner,
grilled mushrooms,
grilled pineapple,
grilling,
mushrooms,
pineapple,
shiraz,
steak,
steak sauce,
sweet potatoes,
wine
Subscribe to:
Posts (Atom)