Wednesday, March 30, 2011

Pot Roast: A Classic


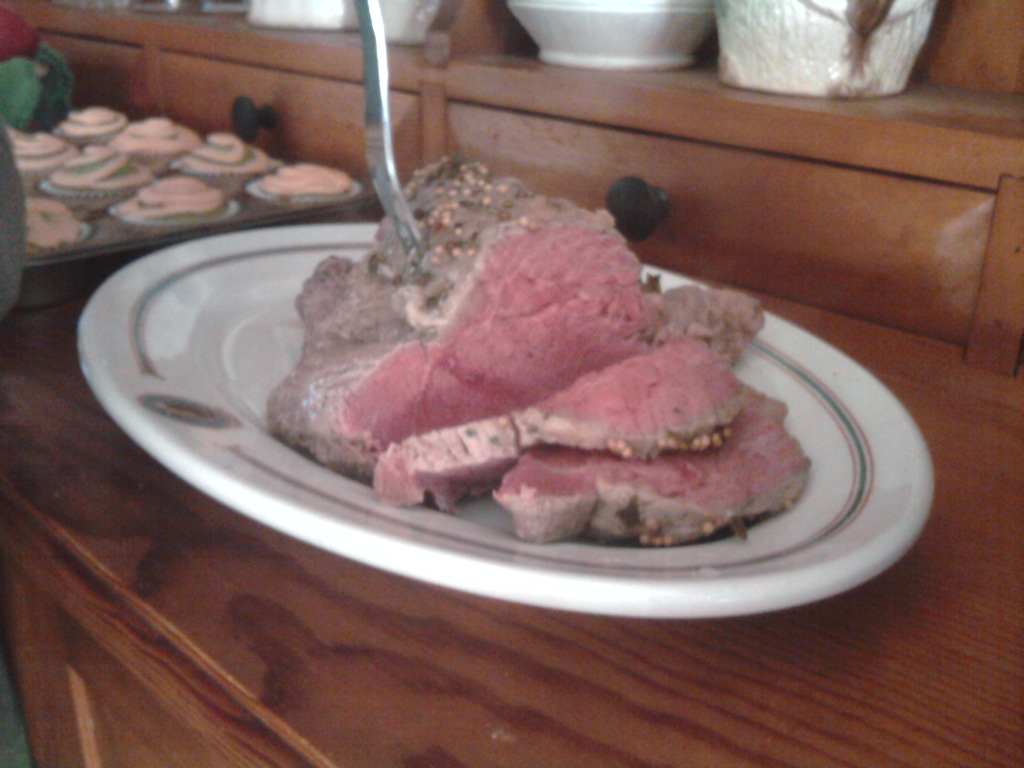
Well, the Weatherbug was calling for snow today, so I planned a pot roast for dinner tonight. Murphy's Law; today is bright, sunny, and without a cloud in the sky.... Oh well! When I bought this oft overlooked cut of meat at the market, I didn't take into account that I personally had never cooked one! It is a meal my mother made quite frequently (as well as a few friends), and was dumbfounded and humbled that this morning that I honestly had to look up the basic directions! I love this meal, and can't believe I've never cooked this classic, cheap, basic meal. I had a clue of what I thought I should do, and luckily I wasn't far off once I looked it up. This is how I am doing  it  in the crock pot based off the basic themes from a multitude of recipes alongside a slight few of my own flourishes :

You will need:
A Pot Roast (any size, as this is not an exact science)
Salt
Black Pepper
Garlic Powder
Flour 
Olive Oil (with bacon fat if you have it on hand)
Garlic cloves (whole, peeled)
Bay leaves
Onions, chopped
Water, around 1/2 - 3/4 cup 
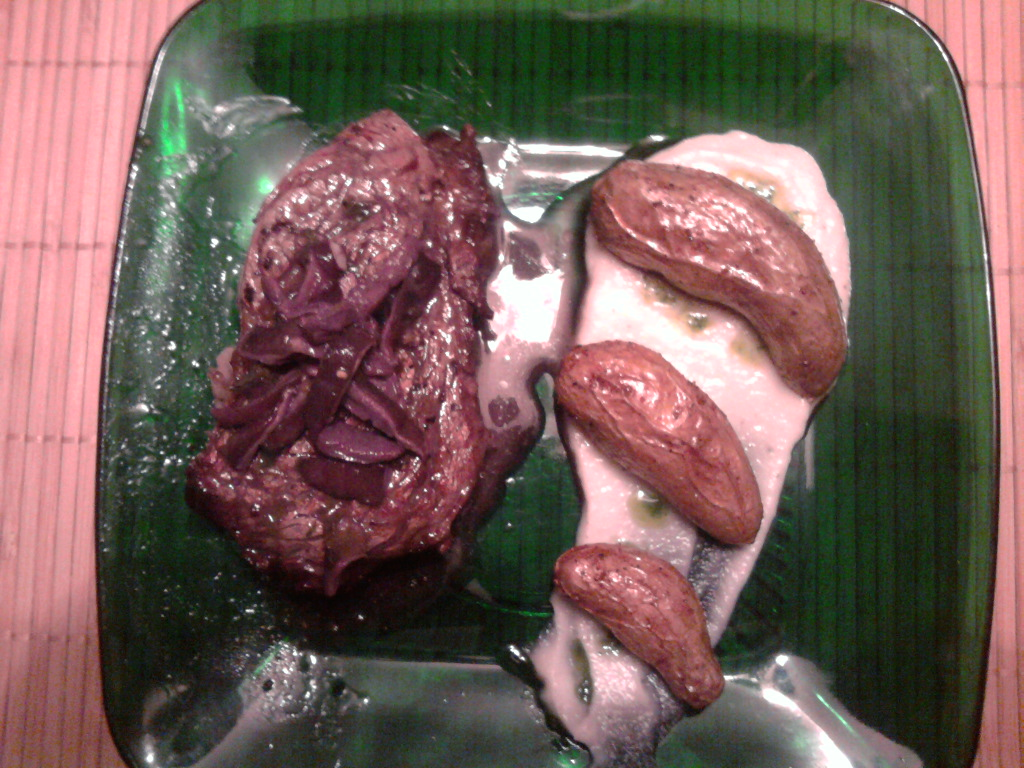
Potatoes, diced large (the kind is your choosing. I used Red potatoes, my mom always used baking Idaho or Maine potatoes)
Celery Salt
Rosemary (fresh is best, but dried is fine)
 

Sprinkle salt, pepper, and garlic powder all over your roast. Cover in a light dusting of flour. Using a hot, oiled skillet, brown roast. Add more oil/fat as needed to prevent sticking. 
Remove roast, and add chopped onions to skillet. Sweat onions, place in bottom of crock pot. Place roast on top of onions; surround with potatoes, 1-3 bay leaves, rosemary, and garlic cloves. 
While your skillet is still hot, add water to pan (but keep heat turned off) and add a wee bit of flour into skillet to create a thin gravy. Pour gravy over ingredients in crock pot. Sprinkle celery salt over everything in the pot, and cook on low until done. Depending on size of roast, plan on 6 hours more or less.

Monday, March 28, 2011

Fried Oysters and Cucumber Wasabi sauce


A total treat last night - Oysters! Sweet, succulent, briny gems encased in an ugly hard shell. A definite perk of living with someone obsessed with fishing and works in that industry- fresh seafood. One of his friends offered us some oysters that he dug himself that morning. Yay! Now, what to do with them?...

Honestly, I have only had oysters a few times at my favorite sushi restaurant, never at home. I certainly couldn't recreate the way they make them at Tokyo Japanese Restaurant [Las Vegas, NV], baked in the half shell with their house Yum-Yum sauce. So, other options.... Slide them right down raw with a squeeze of lemon and Tabasco? No, that's a waste of a good oyster- no time to savour the taste. Grilled? Hmmm, maybe. Fried? Now we're talking!

Using a flat head screwdriver in place of an oyster knife, we carefully extracted the meat. Shucking an oyster really isn't as hard as it seems- don't let that intimidate you. With the flat side of the shell up, and a little elbow grease and leverage at the base joint, cracking open the shell is rather easy.


Next, simply drain and pat dry the oyster meat. Salt and pepper the meat, then roll in bread crumbs and fry them like you would anything else. We found 3 minutes per side was absolutely perfect. The only thing I would have done different was to coat them in an egg batter before breading, and maybe add a little paprika along with the salt and pepper. The breading I used was a mixture of Panko, fresh parsley (chopped medium fine), and dried dill. Also, squeeze a little bit of lemon juice on top of the oysters to enhance the flavor before serving.


As you can guess from the title of this post, I made a Cucumber Wasabi dip to go along with the fried oysters. Let me tell you, it was the perfect compliment for this dish. Yes, it is a rip-off version of the TGI Friday's sauce served with their green bean fries. Lord, I can't get enough of that dip! If you can't either, here's a close-enough version you can make at home (based off an article from Yahoo! Answers):

Cucumber Wasabi Sauce

1/2 cup Ranch Dressing (Hidden Valley brand for authentic taste)
1/4 cup Cucumber, peeled, large diced
1 tbsp. Milk or half and half
2 tsp. Wasabi 
1 tsp. Horseradish (the creamy prepared kind)
1 tsp. Cider Vinegar
dash Salt
dash Cayenne Pepper

Put all ingredients into a blender, and blend until smooth. Let sit for at least half an hour in fridge to thicken.  

Friday, March 25, 2011

How to make wine sacks

Wine sacks are a simple and easy way to dress up a bottle of wine. Perfect to make as gift bags, or for a 'blind' wine tasting. Here's how I did it step by step:

Pick any fabric of your liking. Cut a piece 14" X 12 3/4" . 
This size will fit almost any style 750ml wine bottle.


With the fabric wrong side up, fold over and pin a 1" hem across the 14" side. 


Sew the hem. This will create the pocket for the ribbon closure.


This is what your sewn hem/ ribbon pocket will look like.


Now, fold the fabric in half, with the right sides facing each other. 
Pin the bottom and open side.


Sew the pinned bottom and side seams. 
NOTA BENE: Do NOT sew all the way up the side. 
You need to allow space at the top hem to thread your ribbon through. 


Now, take the ribbon you have chosen for your closure (make sure it's long enough! At least 18" for this pattern) and attach a safety pin to one end.


With the sack still wrong side out, take the end of the ribbon with the safety pin and guide through your top  hem (ribbon pocket), pulling all the way though. Remove the safety pin once pulled through. 


Turn the sack inside out so the right side of the fabric is showing, 
and you're done!


ENJOY! 

If you are making these for a wine tasting, just add a numbered tag to the ribbon. I was able to bang out 12 of these start-to-finish in about 2 1/2 hours (with the aid of a sewing machine). And trust me, the safety pin step is necessary. It is the best way to fish through any ribbon or string through a closed pocket. Keep that little factoid in mind next time the pull string on your hoodie disappears, and remember to thank me :)

Thursday, March 24, 2011

Flowers, wine bottle sacks


It may have been only 1/2 and inch or so, but we woke up to snow. To bad I already entered my 'spring' picture to the local newspaper, because this would have made a nice submission. Well, maybe except for the cable running to the Christmas lights (yes, they are still up) in it. And, just in case you didn't find that hillbilly enough, the picture I did submit I had to crop out the random PBR beer cans in the background. I still think it came out nice though:


From that refreshing breathe of down-home-ness, let's enter the world of suburban bliss. Yesterday I was busy making wine sacks [among other things for] a blind spring wine tasting we're holding.


I made 12 of them easily using a sewing machine. I usually laud the merits and enjoyability of hand sewing, but I banged out all these sacks in a few hours with the machine. I used left over material from my Flower Girl dress at my best friends wedding. Little did she know, she had the perfect colour green for a spring party years later! Only 2 seams were needed to sew in order to make beautiful functional sacks for wine. I would have tapered the sacks more, but everyone brings their own favorite wine to be judged: the sacks are a drawstring design to accommodate different styles and sizes of bottles. A label can then be attached to the drawstring for judging purposes. I am working out the sewing pattern I made up to be easily understandable that I will post next so you can make your own.

Tuesday, March 22, 2011

Planting spider plants in a strawberry pot


My spider plants were doing quite well and happy in plain old mason jars of water... Until the cats decided they were yummy. So, I bought a neat looking planter to put them in to make them [hopefully] less cat accessible. The problem with the neat looking planter was I had no clue how to use it, or what it was called. Luckily my friend informed me that it was a "Strawberry Pot", and I was able to look up helpful info on it. Of course, I originally did it wrong with no instructions and with out any type of clue, but today I re-potted my spider plants correctly. I followed this article from e-how for help. I hope it works, as watering this type of pot is a wicked pain... Here's a picture of the set up involved in using a strawberry pot:

Monday, March 21, 2011

Spring has sprung, and snow's in the air!

Hooray! The clocks changed a few weeks ago so the daylight is lasting longer, crocuses and daffodils are blooming, the garden is waking up (especially the strawberry plant and chives!), this year's seeds have been ordered and will be here today, robins are back, and new baby chickens arrive in 4 weeks! Clearly, all the signs of spring abound - but, oh, wait- is that snow? And snow in the forecast for the whole week? Ugghh..... C'est la vie...

Aside from that, we made the best ribs ever yesterday. I think we finally figured out the secret to great ribs... I had a little schooling from a Louisiana bayou a few years back on the 'right' way ('cuz yankees don't know how to BBQ), and put some of his tricks to work with my spice combinations and holy crap did magic happen last night! Take a look:


I'm sorry, but this is the one recipe I will not share with y'all...

I can't wait until canning season again -not only because I am getting all new equipment, we are going to make our own BBQ sauce from scratch. [Even though I'm going to me a meanie by not sharing the recipe, I foresee next year's Christmas presents and a roadside stand market for the rib rub & sauce combo in the works, lol].

Anyways, I can't till the baby chickens arrive!

Saturday, March 19, 2011

St. Patricks Day

Hope y'all had a Happy St. Patty's Day!


Of course corned beef and cabbage was on the menu, but not done traditionally as unfortunately that way isn't a favorite for the rest of the household.... I did the corned beef in the crock pot covered in water with bay leaves, pepper, and Old Bay seasoning on low for 6 hours. It couldn't have turned out more perfect!


The cabbage I just made into coleslaw.


Irish soda bread was also served... yummy! A favorite easy bread for any meal.


Roasted red potatoes that were mashed. A particularly savory way to roast the potatoes is by covering them with the green part of leeks that usually gets thrown out. And if you have any left over mashed, you can make potato leek soup (using the 'good' white part of the leeks) the next day!


Last but not least, green cupcakes for dessert! A very talented 4 year old helped me frost them later :)

Thursday, March 17, 2011

Past few meals re-cap

It seems like this week has been nothing but big special dinners! I guess that's what happens when you make a trip out to a chain market that caters to organic and international cuisine... Probably watching the mini-marathon "Iron Chef" before shopping didn't help. That show honestly makes me feel invincible and adventurous in the kitchen! A remiss anniversary dinner coupled with the onslaught of fresh quality ingredients sent me into overdrive... Not to mention all my grand plans for St. Patrick's Day dinner floating in my brain. More on that in the next post, but now, onto pictures!

Mussels and Hard rolls: 


The mussels were simply steamed in white wine with minced shallots, garlic, and parsely. The hard rolls are my favorite roll recipe from Fanny Farmer. The mussel steaming liquid creates a wonderful broth to dip the rolls in.

Ribeye steak, fingerling potatoes, couliflower puree, and red wine mushroom sauce:


The fingerling potatoes were oven roasted, tossed in olive oil with chili powder, garlic powder, salt, and pepper. I placed the potatoes over a cauliflower puree, that was accented with chive oil. The steak was seared for 1 minute on each side, then broiled till done. This was topped by a shiitake mushrooms sauteed in a red wine and butter sauce. I will post the sauce recipe at some point, but is not one I would repeat. The wine over powered the delicate mushroom flavour.

Golden baked fish, asparagus, salad: 


This was a neat recipe -but not a major hit with the family. I enjoyed it, and will post it later. I got some decent Haddock fillets (skin on) and tried out the latest RISAA recipe. It is effectively a savory meringue topping for the fish. I thought this meal was super clever, because the fish topping called for egg whites and I needed egg yolks for the hollandaise sauce over the asparagus. Perfect! A delicious combo no doubt.

Sunday, March 13, 2011

Grits 'n Eggs!


A wonderful brunch yesterday: Runny Eggs on Creamy Grits ...Yummy! Plus any dish that you can garnish with bacon owns! This recipe feeds about 6-8 people, so unless you have a crowd, I suggest cutting it down.

Runny Eggs on Creamy Grits 

5 1/2 cups Water
1/2 tsp. Salt
1 1/2 cups Quick Grits
2 tbsp Butter, unsalted
1/2 cup Parmigiano cheese, finely grated
1/4 cup Green Onions, chopped (white and green parts)
1/2 lb. Bacon, cooked crisply and crumbled
black pepper
8 Eggs, poached or fried
Chives


Bring water to a boil in a medium saucepan. Gradually whisk in grits. Reduce heat to low, and cover. Make sure to stir often until grits are thick and creamy. To this add the butter, cheese, onions, bacon, and pepper. Cook 5 minutes longer.
Place grits in bottom of a bowl, and top with a poached or fried egg. Garnish with bacon and chives (optional).
Important things to remember: When you turn the fridge off to thoroughly clean it, make sure you turn it back on after. That was a nice surprise this morning! Luckily most everything was ok. I figure if the ice cream in the freezer wasn't a melted soup, I'm in good shape.

Friday, March 11, 2011

Latest sewing project...

Sorry I haven't posted anything in a while... I've been very busy hand sewing a dress for my cousins wedding next month..Yes, I own 3 sewing machines and still enjoy hand sewing more. I am making the underskirt out of a beautiful spring green colour jersey material, and did not realize how hard jersey would be to sew! I was just keeping comfort in mind -well, that, and I fell in love with the colour. Also, lots of pattern alteration was deemed necessary because the jersey fabric is so damn stretchy... Though comfortable as all get out, so I reckon it's worth the struggle. The over skirt will be made of a gorgeous sheer chocolate brown with gold Indian influenced borders. It was $25 a yard, so I am very hesitant about starting to sew that -especially without a pattern!

I miss my best sewing buddy in Las Vegas for this venture. Actually, she will be having her second son today so I want to say CONGRATS C & J!

Long story short: forgive me for slacking on posts. I will have to post my Pizzele adventures later... I LOVE these Italian cookies! I am lucky enough to have gotten a pizzele machine on loan, so I am in bliss :)

Tuesday, March 8, 2011

Chocolate Souffle!

I DID IT!

Finally I overcame the daunting fear of that culinary delight: the souffle. I never understood the 'big deal' made about souffles until I tasted it... Mmmmmm....Yum....

What I still can't understand however, is the big deal about making one. It was so easy, I don't know why I've held it in such unattainable high regard all these years! Yes, it's luxurious; Yes, it always wins on Iron Chef. Thus, I thought it was supposed to be hard, arduous, and a litmus test of culinary skills. But really, anyone with the ingredients and an oven can make this! Give this excellent recipe a whirl, and surprise yourself...

Chocolate Souffle for Two

You will need a small Ramekin in order to make this recipe. 

1 oz. Heavy Cream 
4 oz. Semi-Sweet Bakers Chocolate
1/2 tbsp. Butter, salted 
2 Egg yolks
3 Egg Whites 
Cream of Tartar (a small pinch)
1/6 cup White Granulated Sugar (plus a little extra, separate)
Confection Sugar 


Preheat oven to 375 degrees.
Butter sides of Ramekin(s), and pour some white sugar in. Shake and roll the ramekin to coat the bottom and sides with sugar, dumping excess.
Whisk Egg Whites and Cream of Tartar until soft peaks form.
Add White Granulated Sugar to Egg Whites, and whip until stiff peaks form.  
Using a double boiler, melt Chocolate, Butter, and Heavy Cream.
Once melted, whisk in Egg Yolks.
Fold Egg Whites into the Chocolate mixture (but not over the heat!)
Pour folded mixture into Ramekins.
Bake at 375 degrees for 15 minutes. 
DO NOT OPEN OVEN DOOR UNTIL THE 15 MINUTES HAVE PASSED!
Powder Confection Sugar on top Souffle once out of the oven. 
Serve immediately. 
*Keep in mind, the Souffle will deflate some within minutes of being removed from the oven. This is normal.


 Now, the top of my souffle cracked, which I guess is a faux pas. It did not affect the taste in any way -Still, next time, I will throw 1-2 ice cubes on to the bottom of the oven to create some steam which should help. I also do not own "authentic" Ramekins, but my little crocks have the fluted sides and worked perfectly. They are slightly larger than individual Ramekins, so I was able to pour the entire souffle batter into one vessel. But, if I might add, it turned out quite nice for a romantic two person serving that way. I also suggest whenever whisking egg whites is called for, use an electric beater in a metal bowl. The time and energy saved is phenomenal!

Thursday, March 3, 2011

Sweet Anise Pears


I was scrambling around for a last minute side dish to go with dinner, and my gaze met the fruit bowl... After some quick contemplation, I ended up with a delicious pear dish! The sweet syrup flavored with Anise accentuates the natural flavor of the pears perfectly.

Sweet Anise Pears

2 ripe Anjou Pears
3 tbsp. Butter
1/3 cup Sugar (white granulated)
1/4 cup water
2-3 Star Anise (whole)
pinch Salt

Halve and core pears, skin on. Slice each pear half into fours, set aside.
Over medium heat, melt butter in a small sauce pan.
Add Star Anise to melted butter, stirring for around 3 minutes (so the butter does not burn).
Add sugar and water to pan and turn the heat up to medium high.
Stirring constantly, cook until a thin syrup consistency (5-7min), and the Anise is pronounced.
Stir pears into syrup, along with a tiny pinch of salt.
Cook pears until warmed through, but still firm.
Serve warm for 3-4 people.

Wednesday, March 2, 2011

New kitty pictures!

Meet Giger, our new kitty:

Lamb with horseradish panko crust cont.'d


Wow! This turned out even better than it sounded (see previous post for recipe)! Of course, I didn't follow the recipe religiously and just kind of went with it... Adding more of some, less of that. I think the biggest impact came from using 2 different kinds of mustard: Maple Maine Champagne Mustard from Stonewall Kitchen, and inglehoffer's Original stone ground mustard. Brussel sprouts par-boiled and pan fried with a Balsamic Basil vinaigrette, and wild rice accompanied the meal. An excellent wine to serve with this dinner is Pine & Post Merlot from Washington state.

Things I learned while making this recipe- do not add the Panko crust to early! I pan seared the lamb (1min each side), then placed it under the broiler. I broiled the meat for 3 minuets on one side, then turned them over. After turning, I spread the horseradish/mustard mixture on top, generously sprinkled the Panko crust atop that, and returned it to heat under the broiler. HOWEVER... The Panko crust started burning. The lesson, kids, is go to ahead and broil with the horseradish/mustard mixture, but do not add the Panko crust until the very last second.