Terribly sorry for not posting for so long... Amidst the return to 'a real job', the constant garden work at home, general life uncertainties, and the blog/ picture issues for a while there, the blog seemed to have fallen off the wayside. I am finally starting to fall into a normal routine (well, semi-normal) and will start posting frequently again -especially as the garden harvest gears up.
To play catch up a wee bit:
We have been exploring more phenomenal recipes that I can't wait to share with y'all, soon... Especially some amazing grilled desserts I never thought possible.
The garden is doing well finally, and though not as well as hoped for. This growing season is a strange one, and everything is coming in late. The tomato vines are laden with fruit, yet no signs of ripening any time soon. Even my herbs are flowering too late -or in some cases, too early. The only thing that has done great since day one are the bush beans! From 4 plants, I am raking in about 5 beans a day... It doesn't sound like much, but for just 2 people, 13 beans or so makes a side dish. The jalapeño crop should be ready by next week, and I can finally start canning the most amazing pickled jalapeños that are far better than anything found in the market (look for the posted recipe soon!). I have picked one cucumber already, and have several more on the vine. Hopefully enough to can pickles! Though, I doubt my dill seeds will be ready in time- good thing I dried a lot from last year. Our onions look pitiful, as does the musk melon. Though the summer Nevada lettuce is doing great now, the Boston lettuce and Arugula still look paltry.
As for the animals; The baby chickens are no longer babies, though they still go by that title. The older hens are only laying about 3-4 eggs a day vs. the 6-7 per day last summer. The kitties are loving the summer, and bring us at least one mouse a day. We also have a few new aquatic additions, including 2 baby turtles. We're now up to a total of 6 fish tanks, ranging from 1 gallon to 125 gallons.
Ok, that's a pretty good slice of how things stand right now. I promise I will start posting again! It may only be once a week at first, but I'll endeavor for more :) Thank y'all for bearing with me.
Tuesday, July 26, 2011
Thursday, June 16, 2011
Eggplant Parmesan: A Classic
Eggplant Parmesan is one of my favorite Italian meals. It's easier than lasagna, and even heartier than Chicken Parmesan. We had a bout of rainy, cold weather, so I was searching for a warming and filling meal -that still feels light enough for a summer dish. Hence, Eggplant Parm! If it's not already a favorite in your household, it should be. The texture and flavors of this dish let even the 'meat and potatoes' crowd happy to eat a meatless meal.
I don't follow a strict recipe, and I don't even know how true my version is to the authentic Italian fare. Regardless, it's super yummy and easy to throw together. Give it a try! If you don't have fresh mozzarella or herbs, it's ok to use pre-packaged cheese or dried herbs. Just remember, dried herbs are only about 1/2 of what you would need fresh.
Eggplant Parmesan
Ingredients:
1 Eggplant, sliced into 1/4" slices
2 large balls of Mozzarella cheese, sliced into smallish strips (if using shredded mozzarella, approx. 2 cups)
1 can (26 oz.) Spaghetti sauce
Parmesan cheese for grating -about 1/2 cup
3 tbsp. Basil, fresh, chiffonade
2 tbsp. Parsley, fresh, chopped
1 tbsp. Oregano, fresh, chopped
Shortening
Dredge:
2 Eggs
1/4 cup Milk
1 cup Italian style bread crumbs
1/2 cup all-purpose flour
2 tsp. Chili powder
-Beat eggs and milk in a pie pan, set aside
-Mix together bread crumbs, flour, and chili powder in another pie pan, set aside
-Pre-heat oven to 350 degrees
-Melt enough shortening in a 12" skillet to cover about 1/2" deep, and bring up to frying temp.
-Take eggplant slices, and dredge each one into the egg wash 1st, then coat with bread crumb mix.
-Fry eggplant in skillet until golden brown on each side (3-4 minutes per side). You will probably have to do a few batches, so have a draining rack ready to place the fried pieces on.
-Taking a 9" X 13" baking dish, pour enough spaghetti sauce to cover the bottom.
-Lay eggplant to cover bottom of dish.
-Layer evenly (on top of eggplant), 1/2 of each: mozzarella, herbs, spaghetti sauce, and parmesan.
-Repeat layers -eggplant, mozzarella, herbs, sauce, parmesan.
-Bake in 350 degree oven for 30 minutes.
Thursday, June 9, 2011
Perfect Summer Meals: part 1, Scallop Tacos
Summertime, and the livin's easy.... So should should be the meals! Light, easy, and taking advantage of summer crops.
I'll start this series off with the other nights dinner: Scallop Tacos with Cabbage Slaw with Avocado Sauce.

We substituted the scallops with codfish, but followed all the other directions to a T and it was wonderful. The original recipe is posted below, and I see why they used scallops for a more 'meaty' texture. The cod was a decent substitute however, so try either version. This recipe was taken from Weber.com, so there are a lot of grilling instructions.
Scallop Tacos with Cabbage Slaw with Avocado Sauce
Sauce:
1 large Hass avocado, diced
1/2 cup water
1/4 cup loosely packed fresh cilantro leaves and tender stems
1 large jalapeño chile pepper, seeded
1 tablespoon fresh lime juice
1 large garlic clove
Kosher salt
Ground black pepper
Marinade:
3 tablespoons extra-virgin olive oil
Grated zest of 1 lime
2 tablespoons fresh lime juice
2 large garlic cloves, grated or minced
24 sea scallops, each 1 to 1-1/2 ounces
1 cup thinly sliced green cabbage, rinsed under cold water
1/3 cup thinly sliced red onion, rinsed under cold water
8 corn or flour tortillas (6 inches)
Directions:
-In a blender combine the sauce ingredients and process until smooth. Season with salt and pepper. Transfer to a small serving bowl. Set aside at room temperature until ready to serve.
-In a large bowl whisk the marinade ingredients, including 1 teaspoon salt and 1/4 teaspoon pepper. Remove the small, tough side muscle that might be left on each scallop. Add the scallops to the marinade and turn to coat evenly. Cover and marinate at room temperature for 15 to 20 minutes while the grill preheats.
-Prepare the grill for direct cooking over high heat (450° to 550°F).
-In a medium bowl combine the cabbage and onion.
-Brush the cooking grates clean. Lift the scallops one at a time from the marinade, letting the excess marinade drip back into the bowl. Discard the marinade. Grill the scallops over direct high heat, with the lid closed as much as possible, until lightly browned and just opaque in the center, 4 to 6 minutes, turning once or twice. Remove from the grill.
-Warm the tortillas over direct high heat for about 10 seconds on each side.
-Fill each tortilla with some of the cabbage mixture and three scallops. Top with the sauce and serve right away.
*For some, my picture upload site is having some problems, so please don't mind how the pictures are cut off... you should be able to get the idea.


Thursday, June 2, 2011
Grilled Scup
I've said it once, I'll say it again: nothing beats a man that works in the fishing industry! Myself still being a rather fish novice, he brought home a Scup fish for me to try...

He also found this recipe that was quite nice, and I think would work with several other types of fish. You do need a whole intact fish for this recipe, so keep that in mind. Squeamish need not apply! I don't mind scaling a fish, but I'm not a fan of the gutting part. However, if you're up to this, or happen upon a fresh Scup, please give this a try. I will also say, as a word of advisement, you can NOT substitute dried rosemary for fresh in this recipe -I learned the hard way! Another hard lesson was make sure you OIL THE GRILL grates before placing the fish on the grill!
Grilled Scup With Herbs
4 Scup, about 1-1/2 lb
5 sprigs fresh rosemary
3 tbsp. fresh Parsely
1-1/2 tsp. Salt
Freshly ground pepper
1 Garlic clove
1/3 cup Olive oil
2 Lemons
Clean and scale the fish, leaving on head and tails if desired.
Chop the garlic, rosemary and parsley together, add the salt and pepper and a few drops of oil to for a paste.
Make three slits on both sides of each fish.
Spread some paste in the slits as well as the cavity.
Combine juice of 1 lemon with remaining oil.
Grill fish, not too close to coals or heat, basting with oil-lemon mixture.
Cook about 6 minutes to a side, letting skin get crisp. Serve with lemon slice.
*Recipe courtesy American Seafood Institute, Wakefield, RI
Scup

Cleaned and scaled fish with slits

Herb paste in processor

Herb paste applied to fish

Scup on the grill with some corn

Monday, May 30, 2011
Happy Memorial Day
I hope y'all have a happy and safe Memorial day. While you're firing up the grill and opening a drink, pour out a little for all those men and women who have ever served in the Navy, Army, Air Force, Coast Guard, Marines, or any American service branch for our country. God Bless.
The Star Spangled Banner
The Star Spangled Banner
Momma Look Sharp from 1776 (Revolutionary War)
A compilation of Civil War Songs
Over There (WWI)
Over There (WWI)
40 Cups of Coffee (Korea)
Fortunate Son (Vietnam)
Fortunate Son (Vietnam)
Freedom (Gulf War/ Desert Storm)
Courtesy of the Red White and Blue (War on Terror)
Courtesy of the Red White and Blue (War on Terror)
Wednesday, May 25, 2011
Please excuse me...
I haven't written in quite a while, and I apologize for that. First off, Blogspot was having technical difficulties -so I couldn't post even when I tried! That was ok though because I had a dear friend and her newest little one visiting up here from down south for a long weekend. The blog problem seems fixed now, so that's good.
All that aside, it still may be a little bit before I go back to posting as usual, due to a family crisis. Everyone is fine, just some major adjustments are going on currently.
I hope to resume posting quickly though, as the garden and the baby chicks have really taken off and I can't wait to update y'all on their progress.
Thursday, May 12, 2011
Baby chicks Day 2, Seed re-start
Pictures of the babies of day 2 in their new home here. If you missed the pictures of their arrival yesterday, check out my previous post. Obviously not much of a change from then till now -except they've learned that when the hatch to their coop is opened, it means they are going to get scooped up for cuddling -so they run!


As for my seeds, some didn't sprout at all, and some that did, haven't done to well. So today I replanted Lavender, Arugula, Boston and Nevada lettuce, Snap beans, and Cucumber. Lets hope these do better! I have much more ghetto containers this time around, but have a good feeling about them. I believe over watering hindered the Lavender last time, just like to much sun exposure to early killed my lettuces.

The beans and cukes I'm trying to grow the way I did when I was little. The zip-lock baggie and moist paper towel method taped to the window. I will probably do more zucchini this way too because not enough sprouted in the traditional method.

However, some of what I planted previously is thriving. The sunflowers are already placed outside and are doing well, along with green onions and flat leaf parsley outside as well. One snap bean from the first planting has really taken off, and the rest are right along schedule. Hopefully tomorrow brings good enough weather to finish tilling the garden.
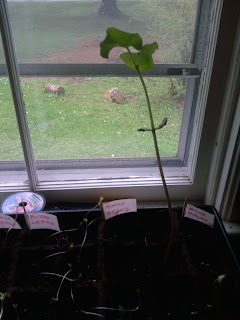
Left to right 6 packs: Cayenne peppers, Jalapeño Peppers

Left to right by rows grown: Musk Melon, Snap Beans, super hot Jalapeño Peppers

Left to right by rows: Tomatoes, tomatoes, tomatoes, summer squash, zucchini, yellow onion

New Arrivals...
BABY CHICKENS!

Hooray! Our baby chicks arrived yesterday! These will be our new batch of layers. They are a variety of Plymouth Rock chickens called Barred Rocks. When they grow up, they will be that beautiful black and white striped colour. But for now, they are the cute little fuzzy chirping bundles of black and yellow joy.
Arrival:


New home:


Prepare for cuteness!


These chicks arrived from Ohio 3 days old. Yes, they come via Postal mail. And if you happened to wonder why the waterer is holding a yellow liquid, it's a special electrolyte solution for the babies. Basically, Pedialyte or Gatorade for chicks. They also have a special diet for the next several months until they mature. I'm not really sure when they will stop needing the heat lamp, but they definitely need it now.
My boyfriends parents ordered 50 chicks, but we only took these 8 as that is all that our coop will contain as adults. All in all, that's a lot of eggs!
Sunday, May 8, 2011
Meatballs: A classic
Somehow I have neglected to post the recipe for my favorite pot-luck or having a crowd over classic: Meatballs! If I know a crowd is coming by, this is my go-to prepare ahead and don't fret food. I usually make this for card game nights. It's perfect because all the ingredients are pantry staples, so you never need to wonder "...do I have the stuff to make this for tonight?" It does take a bit of prep, but all the steps are well worth the results!
Here is my no-fail recipe that is always received extremely well. Tonight I'm making it just for us (over linguine) -which will leave plenty of leftovers for yummy meatball sandwiches later in the week.
Meatballs
1 Lb. ground Hamburger
1/2 cup dry bread crumbs
2 tbsp. Onion, finely chopped
1 tsp. Salt
1 tsp. Worcestershire sauce
1 egg, beaten
You will also need:
Spaghetti sauce (26 oz. can)
Shortening
Skillet
Parchment or wax paper
Baking pan
Crockpot
-Preheat oven to 400 degrees.
-Mix all ingredients together in a large bowl. Using your hands is by far the easiest and most practical way to make sure all the ingredients are thoroughly integrated
-Form the mixture into balls approx 1" round. Place formed meatballs onto parchment paper.
-Heat up enough shortening in your skillet to cover pan about 1/4" deep.
-Place meatballs in skillet, working clockwise (so you remember which ones you put in 1st). Try not to overcrowd your pan. Basically; by the time you place in your last meatball, it's time to turn over your next [continuing in order of clockwise placement]. Keep rotating meatballs as needed to brown on all sides. You are not looking to cook the meatballs, but just to brown them evenly for a crispy skin.
-Place browned meatballs in baking pan. You will most likely have to do 2-3 batches of meatballs in the skillet to finish them all.
-Bake browned meatballs at 400 degrees for 20 minutes.
-Put spaghetti sauce in crock pot, warm on low while meatballs are cooking.
-Take meatballs out of oven when done, and stir into crock pot. Cook on low for 2 hours before serving, or for 1 hour on high.
Serve over pasta, in buns, or straight up.
Feel free to jazz up this recipe -this is just the basic no-fail base. Other additions that work well are using 1/2 lb ground hamburger and 1/2 lb ground pork, fresh parsley (finely chopped), and grated parmigiana cheese into the meat mixture.
Making the meatball mixture:


Cooking the meatballs:


Adding meatballs to the sauce for a finished meal.


Yum! Enjoy...!
Tuesday, May 3, 2011
Grilled Banana S’mores
Recipe as promised!

Grilled Banana S’mores
Crust:
1 cup graham cracker crumbs
4 tablespoons unsalted butter, melted
1 egg yolk
1 tablespoon unsalted butter, melted
Filling:
1 teaspoon brown sugar
2 medium bananas, firm but ripe
4 cups mini marshmallows
1/2 cup semisweet chocolate chips
Prepare the grill for indirect and direct cooking over medium heat (about 400°F).
In a large bowl combine the crust ingredients and mix well. Firmly and evenly press the mixture into the bottom of an 8-by-8-inch baking pan. Grill the crust over indirect medium heat, with the lid closed as much as possible, until firm, 6 to 8 minutes. Remove the crust from the grill and set aside to cool for about 10 minutes. This will allow the crust to set.
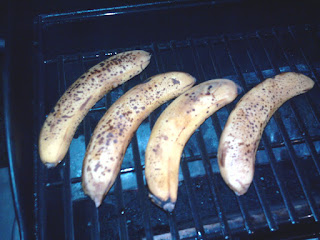
In a small bowl combine the butter and brown sugar. Cut each banana in half lengthwise and leave the skins attached (they will help the bananas hold their shape on the grill). Liberally brush the cut side of the bananas with the butter mixture.
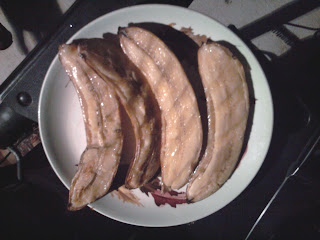
Grill the bananas, cut side down, over direct medium heat, with the lid open, until they start to soften, 2 to 4 minutes, without turning. Let cool briefly and then score the bananas into 1/2-inch slices, cutting through just to the peel.
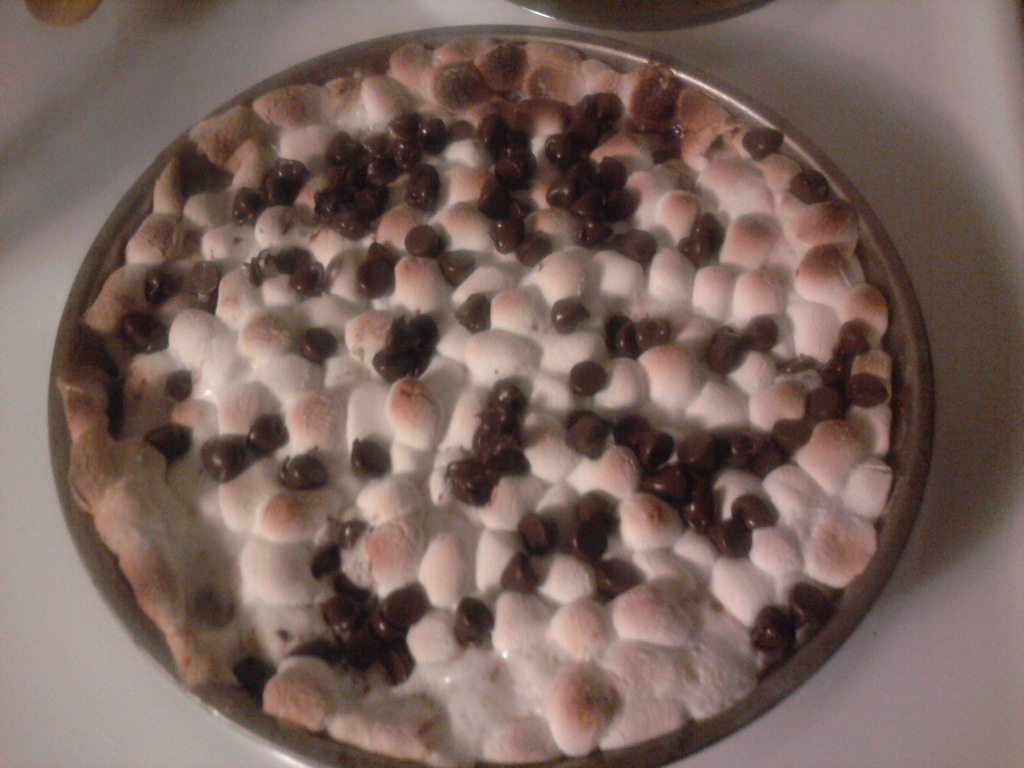
Fill the baking pan with 2 cups of the marshmallows, making sure they cover the bottom of the crust evenly. Next, scoop out and distribute the slices of grilled banana, followed by the remaining 2 cups of marshmallows.
Grill the pie over indirect medium heat, with the lid closed, keeping the temperature of the grill as close to 400°F as possible, until the marshmallows have puffed up and started to brown, 5 to 7 minutes. At this point carefully sprinkle the chocolate chips over the top and continue cooking until the chips appear glossy and melted, about 2 minutes. Remove the pie from the grill and let cool for about 5 minutes. Spoon into small serving bowls and serve warm.
*recipe from Weber.com, recipe of the week by Jamie Purviance.
Now don't tell me that doesn't look and sound delicious? Pretty easy to make too. I will warn you though, that this is SUPER sugary sweet! It was almost to sweet. Next time we decided to make a few changes to this recipe to fit our tastes better. We will double the crust, only use 2 cups of the mini marshmallows, and add a pinch of salt. We also 'cheated' and made this on the gas grill.
Grilled Banana S’mores
Crust:
1 cup graham cracker crumbs
4 tablespoons unsalted butter, melted
1 egg yolk
1 tablespoon unsalted butter, melted
Filling:
1 teaspoon brown sugar
2 medium bananas, firm but ripe
4 cups mini marshmallows
1/2 cup semisweet chocolate chips
Prepare the grill for indirect and direct cooking over medium heat (about 400°F).
In a large bowl combine the crust ingredients and mix well. Firmly and evenly press the mixture into the bottom of an 8-by-8-inch baking pan. Grill the crust over indirect medium heat, with the lid closed as much as possible, until firm, 6 to 8 minutes. Remove the crust from the grill and set aside to cool for about 10 minutes. This will allow the crust to set.
In a small bowl combine the butter and brown sugar. Cut each banana in half lengthwise and leave the skins attached (they will help the bananas hold their shape on the grill). Liberally brush the cut side of the bananas with the butter mixture.
Grill the bananas, cut side down, over direct medium heat, with the lid open, until they start to soften, 2 to 4 minutes, without turning. Let cool briefly and then score the bananas into 1/2-inch slices, cutting through just to the peel.
Fill the baking pan with 2 cups of the marshmallows, making sure they cover the bottom of the crust evenly. Next, scoop out and distribute the slices of grilled banana, followed by the remaining 2 cups of marshmallows.
Grill the pie over indirect medium heat, with the lid closed, keeping the temperature of the grill as close to 400°F as possible, until the marshmallows have puffed up and started to brown, 5 to 7 minutes. At this point carefully sprinkle the chocolate chips over the top and continue cooking until the chips appear glossy and melted, about 2 minutes. Remove the pie from the grill and let cool for about 5 minutes. Spoon into small serving bowls and serve warm.
*recipe from Weber.com, recipe of the week by Jamie Purviance.
Bananas on the gas grill

Bananas after being grilled

Now don't tell me that doesn't look and sound delicious? Pretty easy to make too. I will warn you though, that this is SUPER sugary sweet! It was almost to sweet. Next time we decided to make a few changes to this recipe to fit our tastes better. We will double the crust, only use 2 cups of the mini marshmallows, and add a pinch of salt. We also 'cheated' and made this on the gas grill.
Monday, May 2, 2011
Lotsa Grillin'! Dry-Rubbed Tenderloins with Fire-Roasted Tomato Sauce
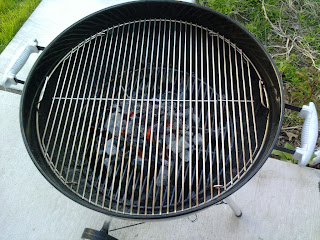
Why is it that guys love grilling? I don't know the answer to that, but I do know it means less cooking for me! Here's a look at our new grill:
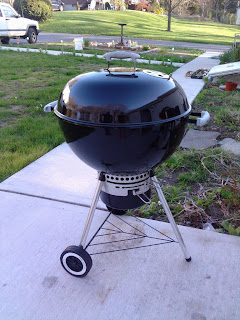
I had a small Weber grill for camping, and loved it. This full size version is amazing (it's a Weber One Touch Gold series). We are still using our regular gas grill for most things, but the Weber is built for smoking meats. You simply can not get the same flavor from a gas grill. This grill also takes more time to cook things, which we are still trying to feel out. I took this next picture without the smoking box however:
Last night's meal was definitely a grill-centric one. We had Dry-Rubbed Pork Tenderloin with Fire-Roasted Tomato Sauce (only we bought a beef tenderloin by accident -oops!), fire roasted red bell peppers, and Grilled Banana S’mores for dessert. The only thing not grilled last night was the potato salad!

The fire roasted tomato sauce reminded me of a Chimichurri sauce. As I already noted, this recipe was meant for a pork loin, but we used a beef tenderloin instead. Tasted just as delicious however! It's rare one of my first-time-trail-meals is received as well as this one last night. A definite repeat. It wasn't the quickest meal in the books, but well worth the preparation (and most of the prep was getting the grill up to correct temp). I was amazed at how different vegetables that I know well tasted fire-roasted. It's mind blowing how the fire blackened and blistered veggies tasted so much sweeter.
Now, onto the recipes so you can experience this meal yourself -and I strongly suggest you do! I will include the changes I made at the bottom. These recipes are taken from Weber.com.
Dry-Rubbed Pork Tenderloin with Fire-Roasted Tomato Sauce
Sauce:
8 ripe plum tomatoes, stems removed
1 jalapeño chile pepper, stem and seeds removed
1/2 cup tightly packed fresh basil leaves
1/3 cup roughly chopped red onion
1/4 cup tightly packed fresh cilantro leaves
1 tablespoon fresh lime juice
2 teaspoons minced garlic
Kosher salt
Ground black pepper
Rub:
1 teaspoon paprika
1 teaspoon dark brown sugar
1 teaspoon kosher salt
1/2 teaspoon pure chile powder
1/2 teaspoon ground black pepper
1/4 teaspoon ground allspice
2 pork tenderloins, each about 1 pound, trimmed of excess fat and silver skin
Extra-virgin olive oil
-Prepare the grill for direct cooking over high heat (450° to 550°F).
-Brush the cooking grates clean. Grill the tomatoes and jalapeño over direct high heat, with the lid closed as much as possible, until blackened and blistered in spots, turning as needed. The tomatoes will take 4 to 6 minutes and the jalapeño will take 2 to 3 minutes. Put the tomatoes and jalapeño in a food processor along with the remaining sauce ingredients, and process until smooth. Season with salt and pepper. Transfer the sauce to a medium saucepan and bring to a boil. Reduce to a simmer and allow to cook until the sauce has thickened slightly, 5 to 10 minutes, stirring occasionally.
-In a small bowl mix the rub ingredients.
-Lightly brush the tenderloins on all sides with oil and season evenly with the rub, pressing the spices into the meat. Allow the tenderloins to stand at room temperature for 15 to 30 minutes before grilling. Reduce the temperature of the grill to medium heat (350° to 450°F).
-Grill the tenderloins over direct medium heat, with the lid closed as much as possible, until the pork is barely pink in the center, 15 to 20 minutes, turning every 5 minutes. Remove from the grill and let rest for 3 to 5 minutes before slicing. Serve warm with the sauce.
So, the only things I changed (other than the protein), was that I cut this recipe in 1/2, but left the 1 jalapeño intact -seeds too!, and probably added a little more red onion than called for a 1/2 recipe. The result was very spicy - but I like it that way. However, the sauce did taste better mixed in with a little sour cream on the side- at least the way I made it. Plus, the recipe just states "chile powder" -which isn't very specific- so I chose to use Ancho Chile powder. We also utilized the smoker box on the grill to cook the meat, filled with Whiskey chips. This made the cook time a little longer, so account for that.

---------
Tonight's dinner is just left overs in an effort to clean out the fridge, so I will leave the Grilled Banana S’mores recipe for tomorrow's post. That, my friends, is a truly tasty treat!

I had a small Weber grill for camping, and loved it. This full size version is amazing (it's a Weber One Touch Gold series). We are still using our regular gas grill for most things, but the Weber is built for smoking meats. You simply can not get the same flavor from a gas grill. This grill also takes more time to cook things, which we are still trying to feel out. I took this next picture without the smoking box however:

Last night's meal was definitely a grill-centric one. We had Dry-Rubbed Pork Tenderloin with Fire-Roasted Tomato Sauce (only we bought a beef tenderloin by accident -oops!), fire roasted red bell peppers, and Grilled Banana S’mores for dessert. The only thing not grilled last night was the potato salad!

The fire roasted tomato sauce reminded me of a Chimichurri sauce. As I already noted, this recipe was meant for a pork loin, but we used a beef tenderloin instead. Tasted just as delicious however! It's rare one of my first-time-trail-meals is received as well as this one last night. A definite repeat. It wasn't the quickest meal in the books, but well worth the preparation (and most of the prep was getting the grill up to correct temp). I was amazed at how different vegetables that I know well tasted fire-roasted. It's mind blowing how the fire blackened and blistered veggies tasted so much sweeter.
Now, onto the recipes so you can experience this meal yourself -and I strongly suggest you do! I will include the changes I made at the bottom. These recipes are taken from Weber.com.
Dry-Rubbed Pork Tenderloin with Fire-Roasted Tomato Sauce
Sauce:
8 ripe plum tomatoes, stems removed
1 jalapeño chile pepper, stem and seeds removed
1/2 cup tightly packed fresh basil leaves
1/3 cup roughly chopped red onion
1/4 cup tightly packed fresh cilantro leaves
1 tablespoon fresh lime juice
2 teaspoons minced garlic
Kosher salt
Ground black pepper
Rub:
1 teaspoon paprika
1 teaspoon dark brown sugar
1 teaspoon kosher salt
1/2 teaspoon pure chile powder
1/2 teaspoon ground black pepper
1/4 teaspoon ground allspice
2 pork tenderloins, each about 1 pound, trimmed of excess fat and silver skin
Extra-virgin olive oil
-Prepare the grill for direct cooking over high heat (450° to 550°F).
-Brush the cooking grates clean. Grill the tomatoes and jalapeño over direct high heat, with the lid closed as much as possible, until blackened and blistered in spots, turning as needed. The tomatoes will take 4 to 6 minutes and the jalapeño will take 2 to 3 minutes. Put the tomatoes and jalapeño in a food processor along with the remaining sauce ingredients, and process until smooth. Season with salt and pepper. Transfer the sauce to a medium saucepan and bring to a boil. Reduce to a simmer and allow to cook until the sauce has thickened slightly, 5 to 10 minutes, stirring occasionally.
-In a small bowl mix the rub ingredients.
-Lightly brush the tenderloins on all sides with oil and season evenly with the rub, pressing the spices into the meat. Allow the tenderloins to stand at room temperature for 15 to 30 minutes before grilling. Reduce the temperature of the grill to medium heat (350° to 450°F).
-Grill the tenderloins over direct medium heat, with the lid closed as much as possible, until the pork is barely pink in the center, 15 to 20 minutes, turning every 5 minutes. Remove from the grill and let rest for 3 to 5 minutes before slicing. Serve warm with the sauce.
So, the only things I changed (other than the protein), was that I cut this recipe in 1/2, but left the 1 jalapeño intact -seeds too!, and probably added a little more red onion than called for a 1/2 recipe. The result was very spicy - but I like it that way. However, the sauce did taste better mixed in with a little sour cream on the side- at least the way I made it. Plus, the recipe just states "chile powder" -which isn't very specific- so I chose to use Ancho Chile powder. We also utilized the smoker box on the grill to cook the meat, filled with Whiskey chips. This made the cook time a little longer, so account for that.
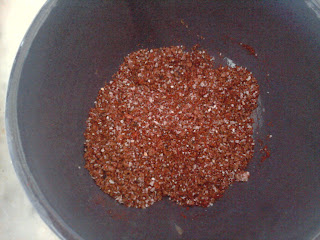
Spice rub mixture.

Spice rub applied to meat. We let it sit for 8 hours in fridge.

Finished meat, plated over sauce, with sides.
Tonight's dinner is just left overs in an effort to clean out the fridge, so I will leave the Grilled Banana S’mores recipe for tomorrow's post. That, my friends, is a truly tasty treat!
OSAMA BIN LADEN DEAD!
As if you haven't already heard, Osama bin Laden is dead. Kudos to the Navy Seals that pulled it off!
As you raise your flag in victory today, just remember to take out a moment to pray for everyone who serves or has served to protect the United States of America. Remember all those hurt or killed on both sides in this War on Terror, and remember to count your Blessings at the same time.
As you raise your flag in victory today, just remember to take out a moment to pray for everyone who serves or has served to protect the United States of America. Remember all those hurt or killed on both sides in this War on Terror, and remember to count your Blessings at the same time.
Sunday, May 1, 2011
Paw Sox!
Hooray! Last night we were able to escape for a date night for the first time since last June... So clearly, we went out to go see the local minor league baseball team! I love baseball, and have gone to see the minor teams wherever I've lived. Nevada has the Area 51's, Maryland the Frederick Key's, and Rhode Island the Paw Sox.

Going to a Paw Sox game (for those of you unfamiliar, they are otherwise known as the Pawtucket Red Sox) is truly an original Rhode Island experience. Fried dough, Del's lemonade, idiot drivers, crazy fans... The best Rhode Island has to offer. Well, except maybe Newport or the Providence Waterfires. I remeber going to Paw Sox games when I was little with my dad, and had a fantastic time last night.

They even had a fireworks show after the game. That was half the reason why we chose to go last night, and the other half was because they were playing against the Toledo Mud Hens (which is a fantastic M*A*S*H reference -yeah, we're kinda geeks).

Thursday, April 28, 2011
Devastation down south
Please Pray for our friends and family down south that have been afflicted by the recent wave of tornadoes.
-------------
I have never been through an actual tornado, but have witnessed several first hand and seen the aftermath. Please, just read this information on what to do if you are issued a tornado warning. It may save your life.
*This information is courtesy Weather.com
When a tornado warning has been issued, you may have very little time to prepare.
How you respond now is critical. And how you react depends on where you are.
In a Frame Home :
Make sure you have a portable radio, preferably a NOAA weather radio, for information.
Seek shelter in the lowest level of your home (basement or storm cellar). If there is no basement, go to an inner hallway, a smaller inner room, or a closet. Keep away from all windows.
You can cushion yourself with a mattress, but do not use one to cover yourself. Do cover your head and eyes with a blanket or jacket to protect against flying debris and broken glass. Don't waste time moving mattresses around.
Keep your pet on a leash or in a carrier.
Multiple tornadoes can emerge from the same storm, so do not go out until the storm has passed.
Do not leave a building to attempt to "escape" a tornado.
In a Mobile Home :
Leave your mobile home immediately and take shelter elsewhere.
Outside:
Try to get inside and seek a small protected space with no windows.
Avoid large-span roof areas such as school gymnasiums, arenas, or shopping malls.
If you cannot get inside, crouch for protection beside a strong structure, or lie flat in a ditch or low-lying area and cover your head and neck with your arms or a piece of clothing.
In a Car :
Ideally, you should avoid driving when tornadoes or other kinds of dangerous weather threaten, because a vehicle is a very unsafe place to be. If, however, this is not possible, stay as calm as possible, and assess the situation.
Your best option might be to get out of the car and lie flat in a ditch or other low-lying area that is sufficiently deep enough to protect against the wind.
If you do so, beware of water runoff from heavy rain that could pose a hazard; get as far away from the vehicle as possible and shield your head from flying debris.
Or, if possible, take shelter immediately in a nearby building.
249 Americans are dead (as of now) from a result of these last storms. Tornadoes can strike no matter where you live. I have seen them in Maine, Massachusetts, and Indiana. No matter what the disaster -be it a hurricane, tornado, or the zombie apocalypse- it is always good to keep an emergency kit on hand. You can view the Government emergency kit check list or see what I keep in mine:
Water, bottled
Food, canned
Medicines, [a one week supply that you or your family are on]
First Aid Kit
Blankets
Radio (with spare batteries)
Flashlight (with spare batteries, but I suggest the self charging type- L.L. Bean carries them)
Candles or kerosene lamp
Knife
Flares
Matches, waterproof
Lighter
Toilet paper
Duct tape or Gaff tape
Rope
Tarp
Lysol wipes (or equivalent product)
Soap
Optional according to needs:
Diapers, Formula, Depends, Legal gun and ammunition, pet food, contact lenses or glasses.
The upkeep on an emergency kit is minimal, but can be life saving. Change out your food, water, and medicines every 6 months. Change out flares, matches, batteries, Lysol wipes, and tape once a year. Everything else should be changed out every 2 years.
Blankets take up the most space by far, so if you can pack them in one of those 'space bags' it's great. Spare clothing can also be put into the kit in a 'space bag', though it's not ultimately necessary to survival. Everything should be able to be packed into 1 Rubber-maid tote, or 2 backpacks. Additionally, everyone in the family should know where the kit(s) are located. By far, the most important things are water, food, medications, first aid, blankets, and light.
*Keep in mind, this is only my guide. Make sure you pay extra attention to Medication expiration dates (such as Insulin or even contact lenses) that may need more frequent switch-outs than the 6 month period suggested.
Seedlings and good weather
My seeds sure haven't wasted any time popping up! Take a look:

And one snap pea has really taken the incentive:
They are growing so fast, we will have to till the new, bigger garden ahead of schedule. I hope it's good weather on Saturday! The past week has brought plenty of rain, though luckily raining mostly at night/ late afternoon, leaving the mornings sunny and in the 70s. Perfect for fishing, and perfect for bringing more flowers into bloom. The tulips I planted last September virtually popped overnight. I lined the main sidewalk to the house with 18 bulbs on each side, for the grand total of 39. They were hit by a sort of blight early on (and for unknown reasons, one side is doing better than the other) but they look beautiful now. This year I aim to frame them in a narrow bed of mulch, decorated with quahog shells between each plant.

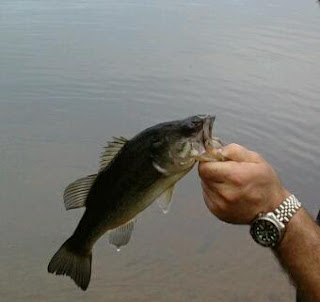
Although I didn't catch anything but a sunburn fishing yesterday, my boyfriend caught 3 fish. Here's a picture of one cute little bass:
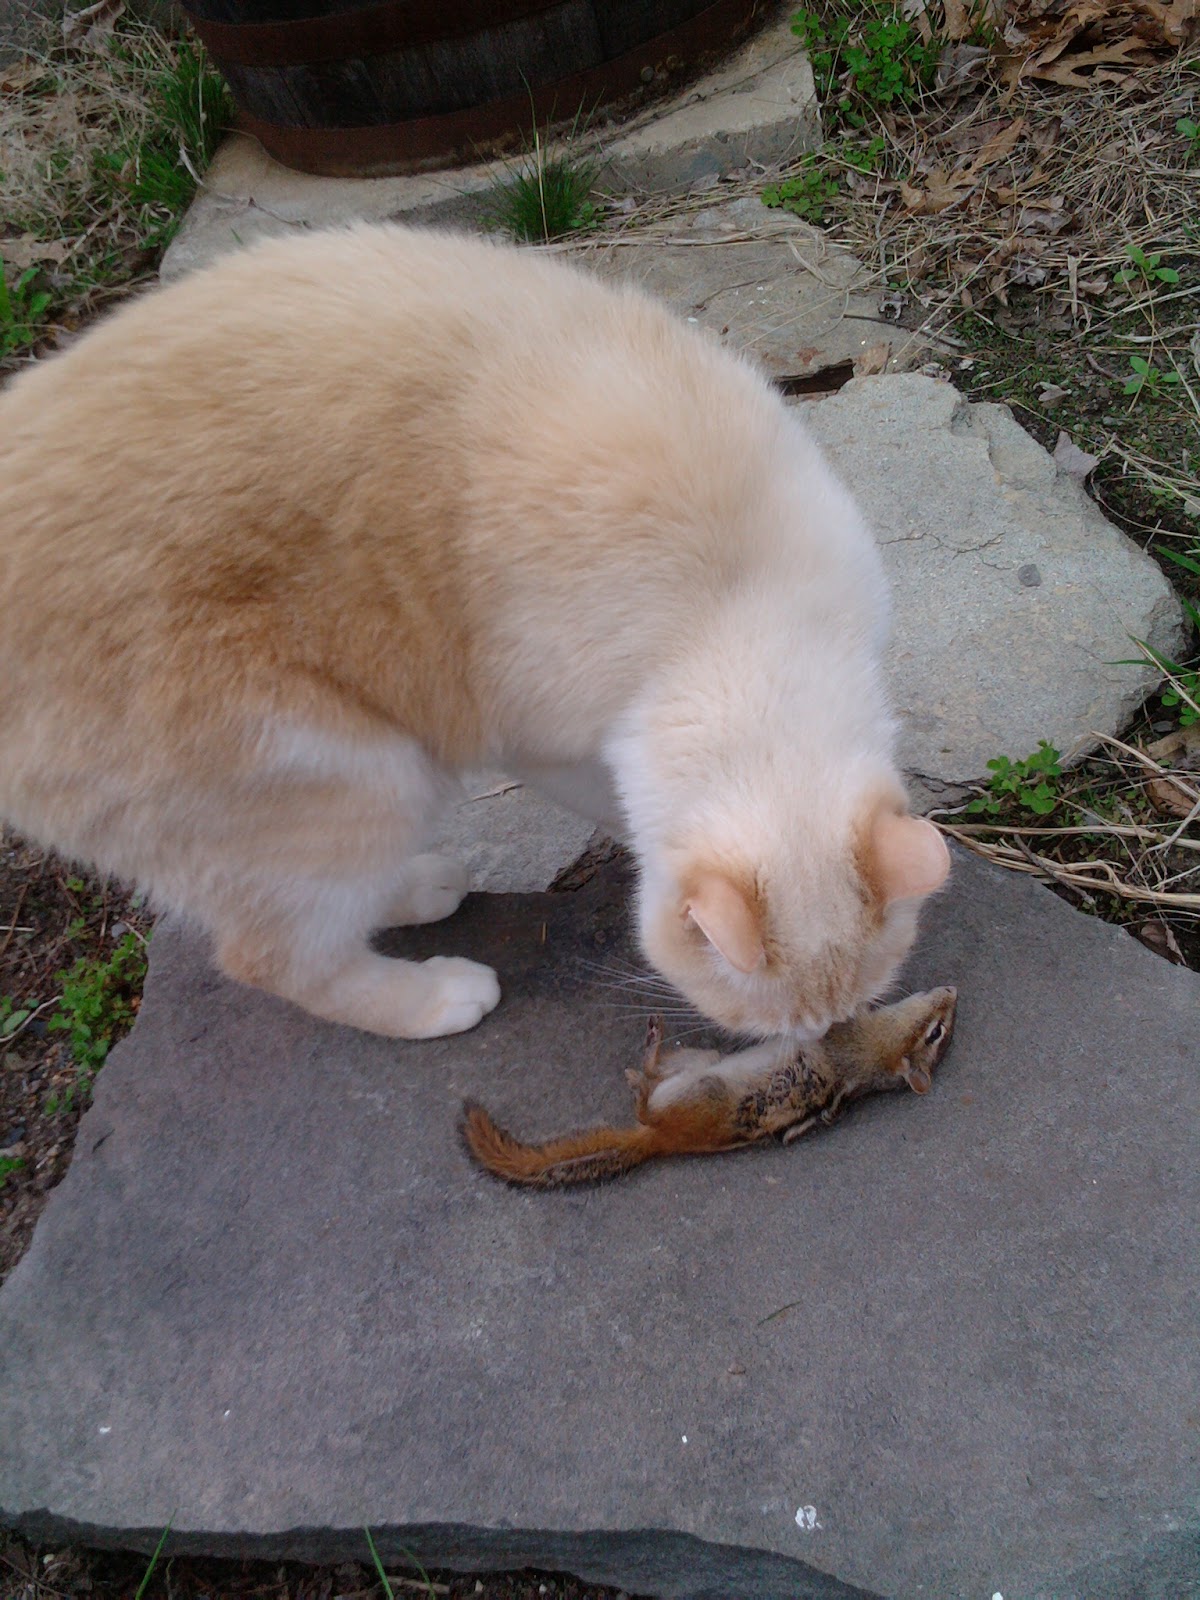
The good weather is also very productive for our kitties -several unfortunate mice have shown up on our doorstep after a long winter hiatus. The biggest surprise was our new kitty who hasn't been outside his whole life until now brought us his first present... A chipmunk no less! We are very proud of him.

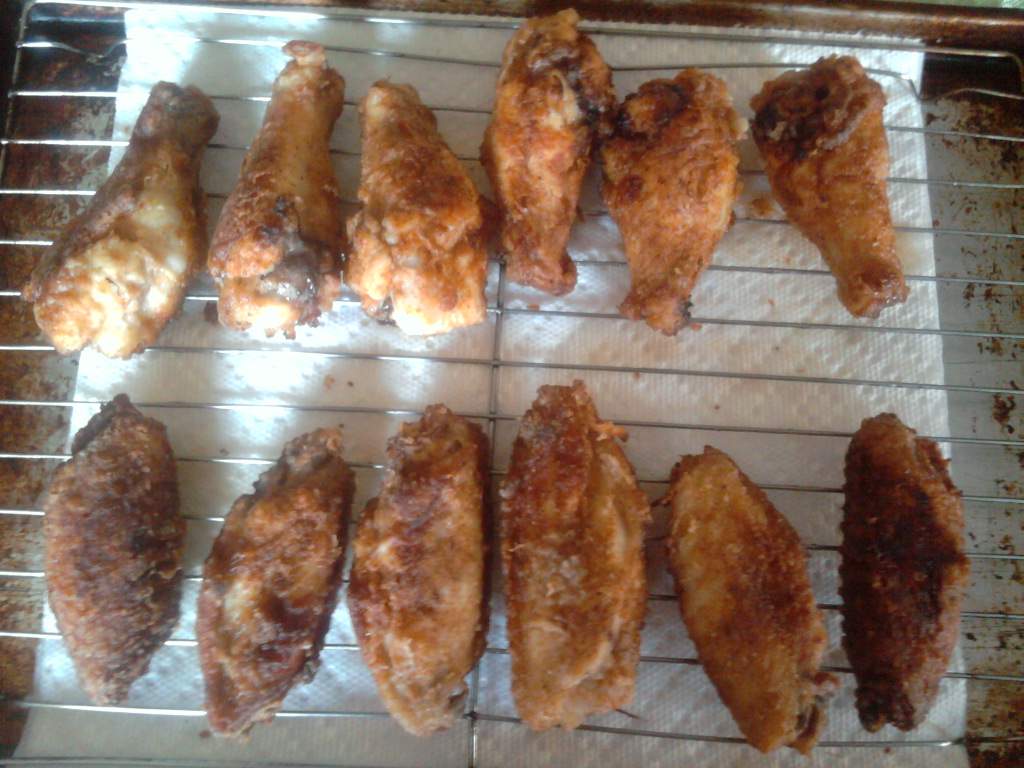
As a result of thus said fair weather has gotten us into summer food mode. The new Weber grill probably helps that urge on. Very basic dinners lately, though yummy as all get out. Fried chicken, coleslaw, potato salad, baked beans, hot dogs and hamburgers...


And one snap pea has really taken the incentive:

They are growing so fast, we will have to till the new, bigger garden ahead of schedule. I hope it's good weather on Saturday! The past week has brought plenty of rain, though luckily raining mostly at night/ late afternoon, leaving the mornings sunny and in the 70s. Perfect for fishing, and perfect for bringing more flowers into bloom. The tulips I planted last September virtually popped overnight. I lined the main sidewalk to the house with 18 bulbs on each side, for the grand total of 39. They were hit by a sort of blight early on (and for unknown reasons, one side is doing better than the other) but they look beautiful now. This year I aim to frame them in a narrow bed of mulch, decorated with quahog shells between each plant.

Although I didn't catch anything but a sunburn fishing yesterday, my boyfriend caught 3 fish. Here's a picture of one cute little bass:

The good weather is also very productive for our kitties -several unfortunate mice have shown up on our doorstep after a long winter hiatus. The biggest surprise was our new kitty who hasn't been outside his whole life until now brought us his first present... A chipmunk no less! We are very proud of him.
As a result of thus said fair weather has gotten us into summer food mode. The new Weber grill probably helps that urge on. Very basic dinners lately, though yummy as all get out. Fried chicken, coleslaw, potato salad, baked beans, hot dogs and hamburgers...

That's about it for now. I'll try not to be so lazy about my posts this week :)
Subscribe to:
Posts (Atom)